Stripe is an online payment processing platform that has gained immense popularity around the world for its convenience and reliability. It is widely used by businesses to accept online payments from customers.
However, opening a Stripe account can be a bit tricky, especially for non-US residents. In this blog post, we will guide you through the process of opening a Stripe account as a non-US resident.
Before proceeding with the Stripe application, please ensure you have the following documents ready:
- US Company and EIN Number (If you haven’t yet formed a US company from from EasyFiling )
- Personal ID (Passport) and Address
- US Business Legal Address, Phone Number, and Website
- US Bank Account
In blog, I will provide a comprehensive guide on how non-US residents, who own a US company but do not have an SSN or ITIN, can successfully set up a Stripe account.
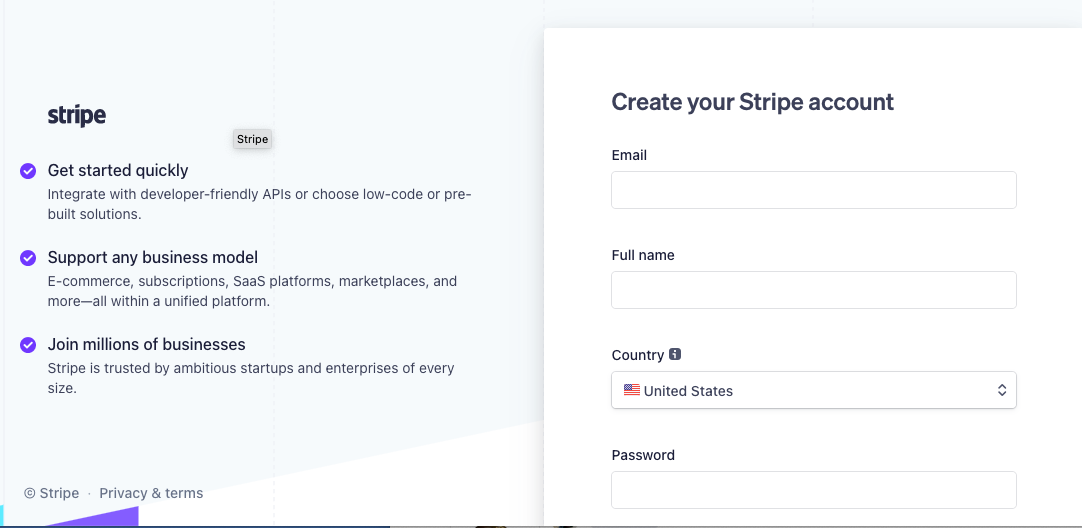
Step 1 : To get started, navigate to the Stripes website and begin completing their forms. Provide your email address, full name, and create a password for your account. Additionally, choose the country where you will conduct your business. For instance, if you have incorporated your business in the US, select the United States from the options.
Step 2: Choose the type of Stripe account:Select the account type, address, and structure that best align with your business requirements.
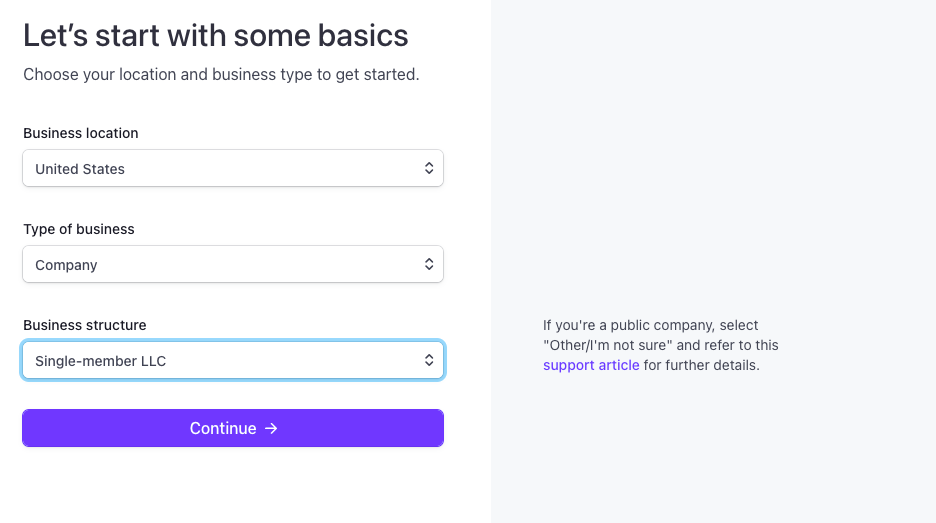
Step 3: Fill out the required information
To create an account, you will be required to fill out some basic information such as your email address, password, and business name. After providing this information, Stripe will ask for more details such as your legal business name, address, and tax ID number.
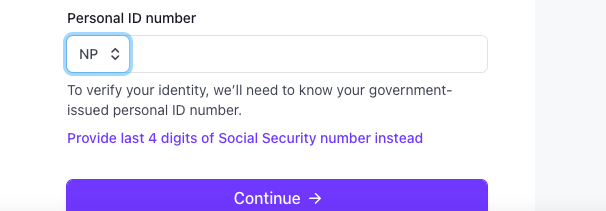
Step 3.1 : When filling out personal details on Stripe, instead of providing your Social Security Number (SSN), you can click on the option to provide a government-issued ID number. As a non-US resident, you can use your Passport as identification documentation.
Step 3.2:Please select the country code for the issuance of your documents. In this case, I am choosing (NP) Nepal as the country where my passport was issued. Kindly provide your passport number and proceed by clicking on the “Continue” button as indicated below.
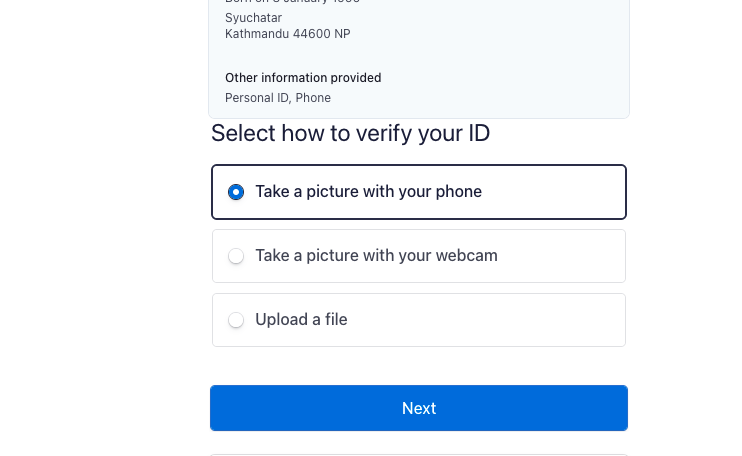
Step 4: After you have provided the necessary information to Stripe, the platform will verify your business details to confirm that you are a legitimate business. This is a mandatory step in the process, and you will need to provide any additional documentation that Stripe may require to verify your personal Information.

To verify your personal information, simply click on the “Start” button. Once you do, you will be directed to a page where you can either upload your document or take a picture of your passport.
Once the document is uploaded, Stripe will verify your personal and business details and activate your Stripe account. After the verification process is complete, your Stripe account will be activated. Congratulations! You can now start accepting payments.
Opening a Stripe account as a non-US resident can seem like a daunting task, but it is a relatively simple process with a few steps to follow. In this blog post, we have provided a comprehensive guide to opening a Stripe account as a non-US resident.
Now you can start accepting online payments without any hassle. Don’t forget to explore all the tools Stripe has to offer to streamline your payment processing and improve your business efficiency.
File Your LLC Today
25$ off with a coupon
Lock in EasyFiling's transparent rates and get lifetime compliance support at no extra cost.
Get Started Now